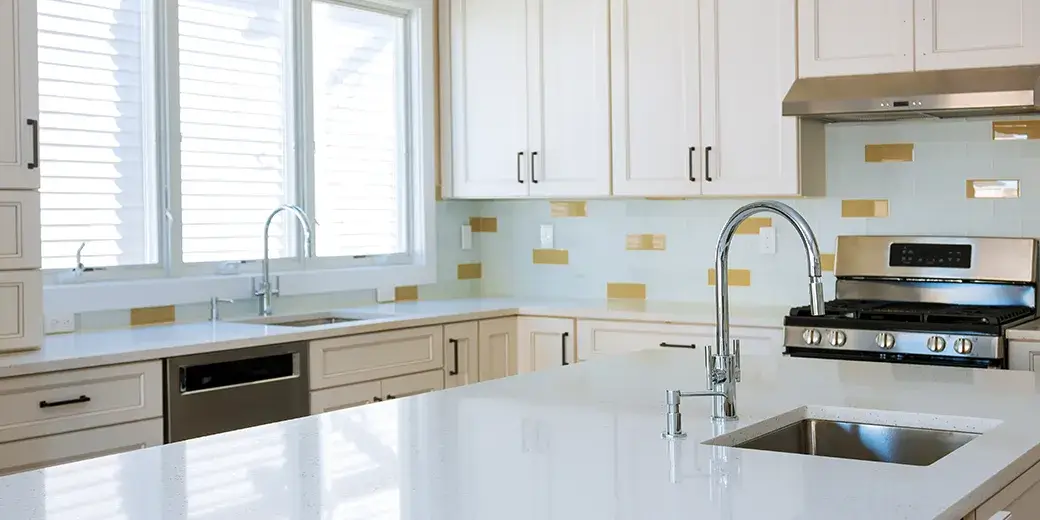
DIY Solutions for Unclogging Your Kitchen Sink
I. Introduction:
A clogged kitchen sink is a common household woe that strikes at the most inconvenient times. The slow draining water, unpleasant odors, and the anxiety of calling a professional plumber can quickly turn a culinary haven into a source of frustration. But fear not, for you can take matters into your own hands with some DIY magic.
In this blog post, we’re about to embark on a journey that puts the power back in your hands – quite literally. We’ll explore a range of do-it-yourself solutions for unclogging your kitchen sink. From common household ingredients like baking soda and vinegar to tried-and-true tools like plungers and drain snakes, we’ve got a toolbox full of techniques to tackle even the most stubborn of clogs.
Not only will these DIY solutions save you the time and money that comes with professional plumbing services, but they’ll also empower you with the knowledge to prevent future clogs. So, roll up your sleeves, put on your DIY cap, and get ready to reclaim the full functionality of your kitchen sink. With our step-by-step guidance and a bit of elbow grease, you’ll have your sink flowing smoothly in no time.
II. Assessing the Severity of the Clog:
Assessing the severity of a clog is a crucial initial step when dealing with a clogged kitchen sink. Understanding the extent of the blockage helps you determine which DIY solutions or tools are appropriate and can prevent unnecessary efforts or potential damage to your plumbing system. Here’s a detailed explanation of how to assess the severity of a clog:
- Signs of a Minor Clog:
- Slow Drainage: A minor clog often manifests as slow drainage. You’ll notice that water takes longer to empty from the sink.
- Gurgling Sounds: Gurgling or bubbling sounds when water goes down the drain are also indicative of a partial blockage.
- Partial Blockage: In some cases, you might still observe water going down, albeit at a reduced rate.
- Signs of a More Serious Blockage:
- Complete Blockage: If water doesn’t go down the drain at all, you likely have a more severe clog.
- Backup in Other Fixtures: A clog in the main drain line can result in backups in other fixtures, such as the bathroom sink or bathtub.
- Unpleasant Odors: A foul smell emanating from the sink can indicate a more serious clog, often caused by decomposing food or debris.
- Why It’s Important to Assess Severity:
- Selecting the Right Solution: Identifying the severity of the clog helps you choose the appropriate DIY solution. For instance, a minor clog may be resolved with a simple remedy like baking soda and vinegar, while a major blockage might require a more robust approach.
- Avoiding Damage: Using the wrong solution or excessive force on a severe clog can potentially damage your plumbing or exacerbate the problem. Proper assessment prevents unnecessary risks.
- Estimating Effort: Knowing the severity helps you gauge the amount of effort and time required to clear the clog.
- Tools for Assessment:
- Observation: Carefully observe the water drainage and listen for any unusual sounds.
- Professional Inspection: If you are uncertain about the severity or the clog persists after attempting DIY solutions, consider consulting a professional plumber.
- Next Steps Based on Severity:
- Minor Clogs: For minor clogs, you can start with DIY solutions like baking soda and vinegar, plunging, or using a drain snake.
- Major Clogs: In the case of a major blockage, it might be more prudent to consult a plumber who can assess and address the issue effectively.
Assessing the severity of a clog is the first step in tackling the problem efficiently and safely. By accurately diagnosing the issue, you can select the most appropriate DIY solution and increase the likelihood of successfully unclogging your kitchen sink.
III. DIY Tools and Materials
When it comes to unclogging your kitchen sink using do-it-yourself (DIY) methods, having the right tools and materials is crucial. These items will help you tackle the clog effectively and safely. Here’s a detailed explanation of the DIY tools and materials you might need:
- Plunger:
- Role: A plunger is an essential tool for dislodging minor clogs. It creates a vacuum seal over the drain and, when used correctly, can help push or pull obstructions out of the way.
- Types: There are different types of plungers for different sinks – flat-bottom plungers for sinks and bulb plungers for toilets. Make sure you have the appropriate one for your kitchen sink.
- Baking Soda and Vinegar:
- Role: Baking soda and vinegar are common household items used to create a chemical reaction that can help dissolve minor clogs and eliminate odors.
- How to Use: By pouring baking soda down the drain, followed by vinegar, you create a fizzing action that can break down debris and blockages.
- DIY Drain Snake or Auger:
- Role: A drain snake or auger is a long, flexible tool that can reach deep into the drainpipe to dislodge and remove clogs.
- Types: There are manual hand-cranked drain snakes and electric-powered augers. Choose the one that suits your needs.
- Bucket and Towels:
- Role: A bucket is useful for catching water and debris that may flow back out of the sink while you work on unclogging it. Towels can help contain spills and keep your workspace dry.
- Adjustable Wrench or Pliers:
- Role: These tools are handy for tasks like loosening and tightening plumbing connections, such as removing the P-trap or other pipe sections.
- Types: An adjustable wrench or a pair of pliers is typically used for these purposes.
- Gloves and Safety Goggles:
- Role: Safety is paramount when dealing with plumbing. Gloves protect your hands from dirty water and potential sharp objects, while safety goggles shield your eyes from splashes.
- Commercial Drain Cleaner (Optional):
- Role: Commercial drain cleaners are chemical solutions designed to dissolve clogs. They are often used as a last resort for stubborn clogs.
- Use with Caution: If you choose to use a commercial drain cleaner, follow the manufacturer’s instructions carefully and take safety precautions.
Having these DIY tools and materials at your disposal equips you to effectively address clogs in your kitchen sink. Keep in mind that the specific tools and materials you’ll need may vary depending on the severity and nature of the clog, so it’s essential to assess the blockage before determining which DIY method to use.
IV. Solution 1: Baking Soda and Vinegar
One of the most popular and environmentally friendly DIY solutions for unclogging your kitchen sink involves using a combination of baking soda and vinegar. This method relies on a simple chemical reaction that can help dissolve minor clogs and eliminate odors. Here’s a detailed explanation of how to use baking soda and vinegar to unclog your kitchen sink:
- Materials Needed:
- Baking soda
- Vinegar
- A kettle or pot (optional)
- A bucket or towel (for containing spills)
- Step-by-Step Guide:
- Clear the Sink: Remove any standing water from the sink if present. If your sink is completely blocked and water doesn’t drain, you can skip this step.
- Measure and Pour Baking Soda: Start by measuring about 1/2 cup of baking soda. Pour the baking soda down the drain.
- Add Vinegar: Next, measure and pour approximately 1/2 cup of vinegar down the drain as well. You will notice immediate fizzing and bubbling – this is the chemical reaction that helps break down clogs.
- Wait and Let It Work: Allow the baking soda and vinegar mixture to sit in the drain for at least 15-20 minutes. During this time, it will work to break down the clog and deodorize your sink.
- Boiling Water (Optional): To further help dislodge the clog, you can boil a kettle or pot of water and carefully pour it down the drain. The hot water can flush away the dissolved clog.
- Test the Sink: Turn on the faucet to see if the water drains more rapidly. If it does, the clog may have been successfully removed. If not, you can repeat the process or try a different method.
- Preventative Measures:
- To prevent future clogs, use a strainer or drain cover to catch food particles and debris before they enter the drain.
- Regularly use the baking soda and vinegar method as a preventative measure to keep your sink smelling fresh and clear of minor clogs.
Benefits:
- This method is eco-friendly and uses common household items.
- It is generally safe for your plumbing and septic systems.
Caution:
- This solution is best for minor clogs and may not be effective for more severe blockages.
- Do not use this method if you have already poured chemical drain cleaners down the sink, as the combination of chemicals can be hazardous.
Using baking soda and vinegar is an accessible and effective DIY solution for minor kitchen sink clogs. It’s a safe and eco-friendly option that can help you maintain a smoothly running sink. However, for more stubborn or severe clogs, you may need to explore other DIY solutions or consider professional assistance.
V. Solution 2: Plunger Power
A plunger is a versatile and effective tool for unclogging kitchen sinks. It creates a seal over the drain opening, allowing you to exert force and pressure on the clog to dislodge it. Here’s a detailed explanation of how to use a plunger to unclog your kitchen sink:
Materials Needed:
- Plunger (either a flat-bottom or bell-shaped plunger, depending on your sink type)
- A bucket or towel (for containing spills)
Step-by-Step Guide:
- Clear the Sink: Ensure there is no standing water in the sink. If there is, remove it with a bucket or container.
- Position the Plunger: a. Place the plunger over the drain opening, ensuring that it covers it completely. b. Make sure the plunger is submerged in water (add a small amount of water if necessary) to create an airtight seal.
- Apply Pressure and Plunge: a. Push down on the plunger with a firm, even pressure, then pull up quickly to create a suction effect. b. Repeat this plunging motion several times, maintaining a strong seal over the drain.
- Test the Drain: a. After a few plunging attempts, turn on the faucet and check if the water drains more rapidly. b. If it does, the clog may have been dislodged. If not, continue plunging until you notice an improvement.
- Repeat if Necessary: a. If the sink still drains slowly or remains clogged, continue plunging and testing the drain until the clog is cleared.
Benefits:
- Plungers are readily available and affordable.
- They are effective for dislodging minor to moderate clogs.
- This method is relatively safe for your plumbing system.
Caution:
- Be cautious not to use excessive force, as it may damage your plumbing.
- Plunging is most effective for simple clogs near the drain. For more severe blockages deeper in the pipe, other methods may be needed.
Using a plunger is a straightforward and commonly used DIY solution for kitchen sink clogs. It’s best suited for minor to moderate clogs, and when used correctly, it can effectively clear blockages and restore proper drainage. If the clog persists or appears to be more severe, you may need to explore other DIY methods or consider professional help.
VI. Solution 3: DIY Drain Snake
A DIY drain snake, also known as a drain auger, is a flexible, coil-like tool designed to reach deep into the plumbing and dislodge clogs that may be located further down the drainpipe. This solution is particularly effective for more stubborn clogs that cannot be easily reached or cleared with simpler methods like plunging or using chemical solutions. Here’s a detailed explanation of how to use a DIY drain snake to unclog your kitchen sink:
Materials Needed:
- DIY drain snake (available at hardware stores)
- A bucket or container
- Towels or rags (for spills)
- Gloves (optional, for added cleanliness)
Step-by-Step Guide:
- Clear the Sink:
- Ensure there is no standing water in the sink. If there is, remove it with a bucket or container.
- Extend the Drain Snake:
- Insert the coiled end of the DIY drain snake into the sink drain, feeding it slowly while turning the handle clockwise. Continue doing this until you encounter resistance.
- Locate and Dislodge the Clog:
- Once you encounter resistance, you have likely reached the clog. Rotate the handle of the drain snake to maneuver and dislodge the clog. Be patient and gentle to avoid damaging your pipes.
- Retrieve or Break Up the Clog:
- Depending on the nature of the clog, you may feel it breaking up or attaching itself to the snake. Slowly retract the snake, bringing the clog with it.
- Test the Sink:
- After using the drain snake, turn on the faucet and check if the water drains more rapidly. If it does, the clog may have been successfully removed. If not, you can repeat the process or try a different method.
- Clean the Drain Snake:
- After use, thoroughly clean and disinfect the drain snake. Properly store it for future use.
Benefits:
- DIY drain snakes are readily available and can effectively reach and clear clogs located deeper in the plumbing.
- They are reusable and a more environmentally friendly solution compared to chemical drain cleaners.
Caution:
- Use the DIY drain snake with care and follow the manufacturer’s instructions to avoid damage to your plumbing.
- If you’re uncomfortable using the DIY drain snake or if the clog persists, consider seeking professional plumbing assistance.
A DIY drain snake is a practical and cost-effective solution for more challenging clogs that may be situated deeper in the drainpipe. With a gentle touch and patience, you can dislodge and remove obstructions that are difficult to reach with other methods. If you’re unsure about using the drain snake or if the clog persists, it’s advisable to consult a professional plumber.
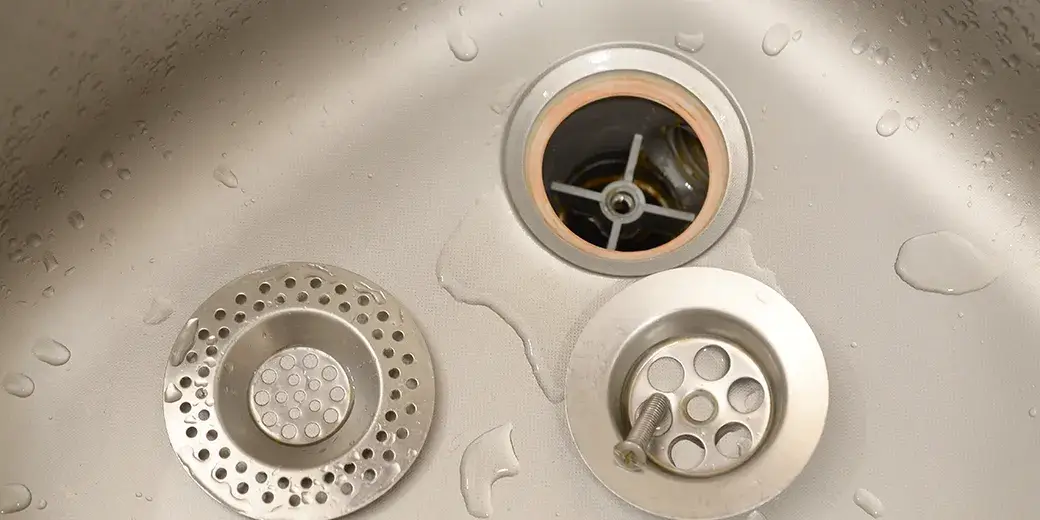
VII. Solution 4: Removing and Cleaning the P-Trap
The P-trap, or P-bend, is a curved section of pipe located beneath the sink that serves to prevent sewer gases from entering your home while also trapping debris. Removing and cleaning the P-trap is a more involved DIY solution for unclogging a kitchen sink, but it can be highly effective, especially for clogs located in this part of the plumbing. Here’s a detailed explanation of how to remove and clean the P-trap:
Materials Needed:
- Adjustable wrench or pliers
- A bucket or container
- Towels or rags (for spills)
- Replacement washers (optional)
Step-by-Step Guide:
- Safety First:
- Ensure your sink is not running and that there’s no water in the sink.
- Place a bucket or container under the P-trap to catch any water or debris that may spill out.
- Access the P-Trap:
- Locate the P-trap beneath the sink. It is the curved pipe that extends from the bottom of the sink drain to the wall or plumbing assembly.
- Loosen Connections:
- Using an adjustable wrench or pliers, carefully loosen and remove the slip-nut connections on both ends of the P-trap. One end connects to the sink’s drain tailpiece, and the other connects to the horizontal drainpipe.
- Remove the P-Trap:
- Gently slide the P-trap out of place. It may still contain water and debris, so be prepared to empty it into the bucket.
- Inspect and Clean:
- Examine the P-trap for the clog. You might find the obstruction within the trap itself.
- Empty the contents of the P-trap into the bucket and remove any debris, such as food particles or other materials.
- Clean the P-Trap:
- Rinse the P-trap thoroughly with water to remove any remaining debris.
- You can use a bottle brush or a similar tool to clean the inside of the P-trap and its components. Ensure all the gunk is removed.
- Reassemble:
- Reconnect the P-trap to the drain tailpiece and the horizontal drainpipe, making sure the slip-nut connections are snug but not overly tightened.
- Test the Sink:
- Turn on the faucet and check if the water drains freely. If it does, the clog may have been successfully removed.
Benefits:
- Removing and cleaning the P-trap directly addresses clogs in this section of the plumbing.
- It’s a relatively cost-effective and DIY-friendly solution.
Caution:
- Be careful when using tools to prevent damaging the P-trap or other plumbing components.
- Ensure proper reassembly, and check for leaks after cleaning and reattaching the P-trap.
Removing and cleaning the P-trap is a practical DIY solution for addressing clogs that are localized in this part of the plumbing. It’s particularly effective for clogs caused by debris that has accumulated in the P-trap. If the clog persists or is located deeper in the pipe, you may need to consider other DIY methods or professional assistance.
VIII. Solution 5: Hot Water and Salt Flush
Using a hot water and salt flush is a straightforward DIY method for unclogging your kitchen sink. This method is effective for dealing with minor clogs, particularly those caused by grease, soap residue, or similar materials. The combination of hot water and salt helps dissolve and flush away the blockage. Here’s a detailed explanation of how to use a hot water and salt flush to unclog your kitchen sink:
Materials Needed:
- Table salt
- A kettle or pot
- A bucket or container
- Towels or rags (for spills)
Step-by-Step Guide:
- Clear the Sink:
- Ensure there is no standing water in the sink. If there is, remove it with a bucket or container.
- Boil Water:
- Fill a kettle or pot with water and bring it to a boil. The water should be hot but not necessarily boiling when poured into the sink.
- Add Salt:
- While the water is heating, measure and add about a half-cup of table salt to the drain.
- Pour Hot Water:
- Carefully and slowly pour the hot (but not boiling) water down the drain. The combination of hot water and salt will work to dissolve and flush away the clog.
- Wait and Test:
- Allow the mixture to sit for several minutes, typically around 15 to 20 minutes. During this time, it will work to break down the clog.
- Turn on the faucet to check if the water drains more rapidly. If it does, the clog may have been dislodged. If not, you can repeat the process or try a different method.
Benefits:
- The hot water and salt method is simple and uses common household items.
- It’s a safe solution for your plumbing and septic system.
Caution:
- This solution is best for minor clogs and may not be effective for more severe blockages.
- Do not use boiling water as it may damage certain types of pipes. Use hot, but not scalding, water.
Using a hot water and salt flush is a cost-effective and eco-friendly DIY solution for minor kitchen sink clogs, particularly those caused by substances like grease or soap scum. While it may not be suitable for all types of clogs, it’s a safe and accessible method to consider. If the clog persists or appears to be more severe, you may need to explore other DIY methods or seek professional assistance.
IX. Solution 6: Commercial Drain Cleaners
Commercial drain cleaners are chemical solutions designed to dissolve and remove clogs from drains, including kitchen sinks. While not a traditional DIY method, they are readily available and relatively easy to use. However, they should be used with caution due to the potential risks associated with chemical drain cleaners. Here’s a detailed explanation of how to use commercial drain cleaners to unclog your kitchen sink:
Materials Needed:
- Commercial drain cleaner
- Safety goggles
- Gloves
- A bucket or container
- Towels or rags (for spills)
Step-by-Step Guide:
- Safety First:
- Put on safety goggles and gloves to protect your eyes and skin from contact with the chemical cleaner.
- Ensure there is no standing water in the sink. If there is, remove it with a bucket or container.
- Read the Instructions:
- Carefully read and follow the manufacturer’s instructions provided on the commercial drain cleaner’s label. Pay attention to any specific guidelines, safety precautions, or recommended quantities.
- Pour the Drain Cleaner:
- Pour the recommended amount of the commercial drain cleaner directly into the drain. Avoid splashing or spilling the solution.
- Wait and Ventilate:
- Allow the drain cleaner to sit for the recommended time specified on the product label. During this time, the chemicals will work to dissolve the clog.
- Make sure the area is well-ventilated to prevent inhaling any fumes.
- Test the Drain:
- After the recommended waiting time, turn on the faucet and check if the water drains more rapidly. If it does, the clog may have been dissolved. If not, you can repeat the process or try a different method.
- Rinse the Drain Cleaner:
- If the clog is cleared, flush the drain thoroughly with water to rinse away any remaining drain cleaner and residual clog debris.
Benefits:
- Commercial drain cleaners are readily available and easy to use.
- They can be effective in dissolving a variety of clogs in the drain.
Caution:
- Commercial drain cleaners are made of strong chemicals and can be hazardous. Handle them with care and strictly follow safety instructions.
- Do not use commercial drain cleaners if you have already used another chemical solution, as the combination can be dangerous.
- These cleaners can be harmful to certain types of pipes, so consult the product label and use with caution if you have older or fragile plumbing.
Commercial drain cleaners are a last-resort option for unclogging kitchen sinks and should be used with caution. They are typically effective for a variety of clogs, but their use comes with safety risks and the potential for damage to plumbing components. If the clog persists or is severe, it’s advisable to explore other DIY methods or seek professional assistance.
X. Preventative Measures
Preventative measures are crucial in keeping your kitchen sink free from clogs and maintaining efficient drainage. By practicing good habits and performing regular maintenance, you can reduce the risk of clogs and the need for frequent unclogging. Here’s a detailed explanation of some important preventative measures:
- Use a Sink Strainer or Drain Cover:
- Place a sink strainer or drain cover over the drain to catch food scraps, debris, and foreign objects. This prevents them from entering the plumbing and causing clogs.
- Scrape Dishes Before Washing:
- Before washing dishes in the sink, scrape off excess food into the trash or compost bin. Avoid rinsing large food particles down the drain.
- Avoid Pouring Grease Down the Sink:
- Grease and cooking oils should never be poured down the drain. Instead, collect and dispose of them in a separate container or discard them in the trash. Grease can congeal in the pipes and lead to clogs.
- Run Cold Water While Using the Garbage Disposal:
- When using the garbage disposal, run cold water to help flush food particles through the plumbing. Cold water keeps grease solid, making it less likely to adhere to the pipes.
- Limit Starchy and Fibrous Foods:
- Be cautious with foods like pasta, rice, potato peels, and fibrous vegetables. They can expand in water and potentially cause clogs.
- Regularly Clean the Garbage Disposal:
- Clean the garbage disposal by grinding ice cubes and citrus peels to help eliminate odors and remove buildup. You can also use a commercial garbage disposal cleaner.
- Periodically Flush the Drain:
- Flush your kitchen sink drain with hot water to help prevent the buildup of soap residue and other materials that can contribute to clogs.
- Be Mindful of What Goes Down the Drain:
- Avoid letting foreign objects, coffee grounds, eggshells, and large food particles go down the sink drain. Dispose of these items properly.
- Use a Baking Soda and Vinegar Routine:
- Periodically use a baking soda and vinegar solution to maintain an odor-free and clog-free sink. This routine can help keep your plumbing clear.
- Regular Plumbing Maintenance:
- Consider scheduling regular maintenance with a professional plumber to inspect and maintain your kitchen sink plumbing. They can detect and address potential issues before they become serious clogs.
By incorporating these preventative measures into your kitchen sink maintenance routine, you can significantly reduce the risk of clogs and maintain efficient drainage. These practices not only save you from the inconvenience of dealing with clogs but also extend the lifespan of your plumbing system, saving you money in the long run.
XI. Conclusion
In the world of household inconveniences, few things are as aggravating as a clogged kitchen sink. But with the array of DIY solutions and fixes explored in this blog post, you’ve acquired the knowledge and tools needed to become your kitchen’s plumbing hero. From the natural power of baking soda and vinegar to the plunger’s might, the drain snake’s precision, and the magic of hot water and salt, you’ve got an arsenal of techniques at your disposal.
And while commercial drain cleaners are a last resort, they are there when needed. Remember, prevention is key, so practice good sink hygiene by using strainers and following our preventative measures. The power to keep your sink flowing freely is now in your hands, and those unexpected clogs will become nothing more than minor inconveniences.
So, roll up your sleeves, confidently tackle those sink blockages, and enjoy the uninterrupted flow of your kitchen sink once more.
Want a Free Quote?
Contact us today to discuss your needs and get an accurate estimate at no obligation. Planning made easy.
Want a Free Quote?
Contact us today to discuss your needs and get an accurate estimate at no obligation. Planning made easy.

Contact us: